Where Is the Settings Button on Spectrum Remote
Have you ever wondered how to take your buttons to the next level? This tutorial will show you how! In a series of simple steps, you will create a set of beautiful social media buttons packed with subtleties. Along the way you will learn how to make perfect rounded corners, how to add subtle texture and how to add dimension using shadows and gradients. You will also learn how to bring your buttons to life by making some quick but effective rollover states. Buttons are an important but often overlooked element of web design. Let's breathe some attention to detail back into them and get people clicking...
1. Sketch
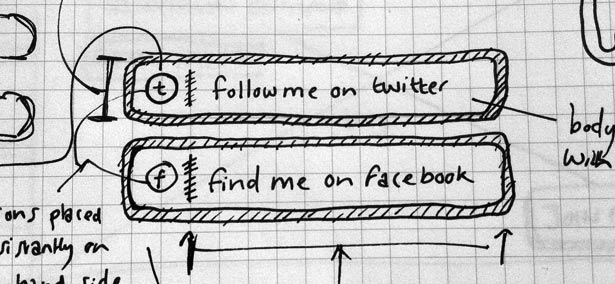
Before I load Photoshop, I like to sketch out ideas, even for elements like buttons. I wanted to create a set of chunky buttons with a decent click area, that will be at home in a website footer or contact page. After a few variations I settled on this idea.
2. Crank it up
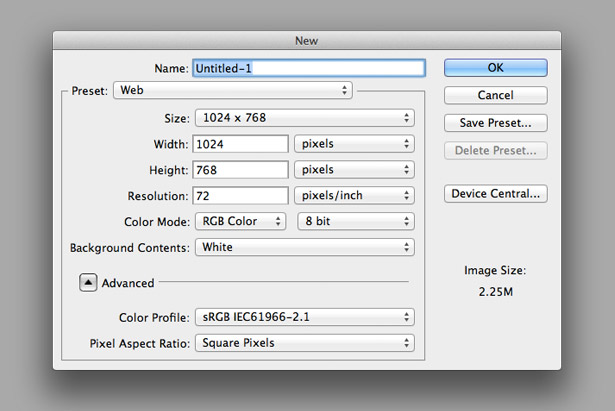
Now we have our idea, crank up Photoshop and create a new 1024 x 768px document (at 72dpi resolution). This canvas size will give us space to create our buttons. To start, we're going to make the Twitter button and use this as the base for the rest.
3. Rounded rectangle
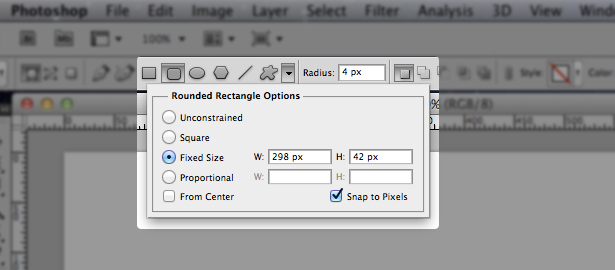
Let's start with the rounded rectangle. With a black fill colour selected, choose the rounded rectangle shape tool. In the options at the top of Photoshop enter the values shown. Then click in the canvas and your shape should appear. I find the shape tool produces the smoothest rounded corners.
4. Gradient Overlay
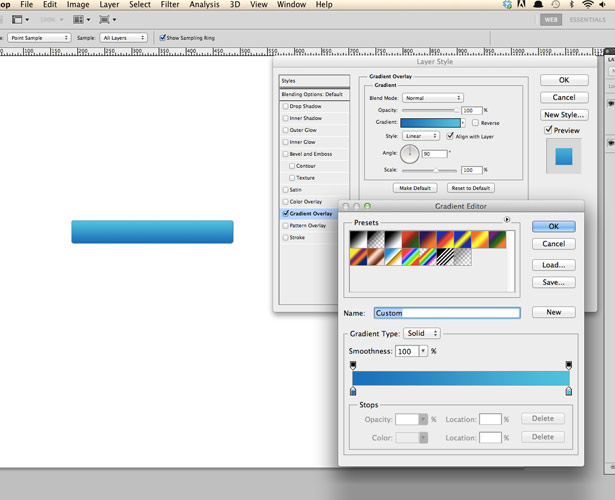
Next we're going to add a colour theme based on the Twitter branding to our rounded rectangle. Open up the layer style dialog and tick gradient overlay. Set the gradient colours from #0d6fb8 to #00c1dd, make the style linear and change the angle to 90 degrees.
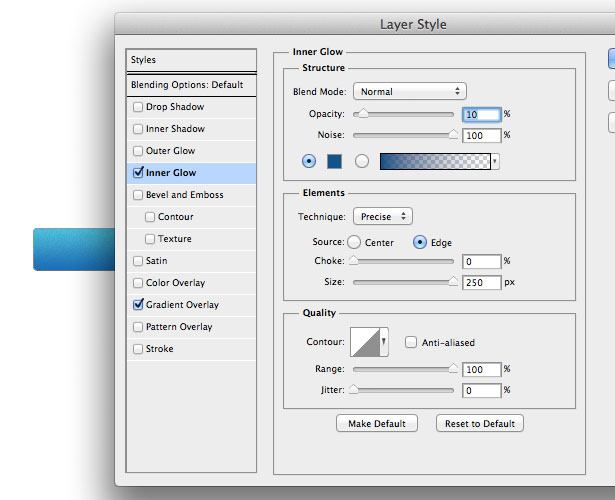
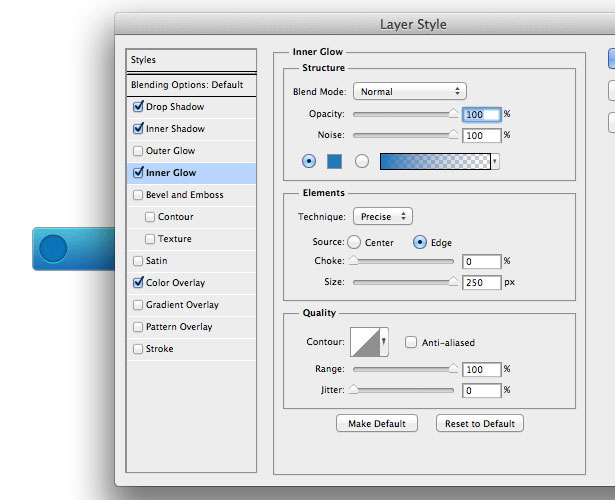
5. Add some grain
Then we're going to add texture using an inner glow. Make the inner glow colour #0a5389 and enter the values in the screenshot. This will add a grain texture on top of the gradient. The aim is to get the texture just visible. Too visible can be distracting.
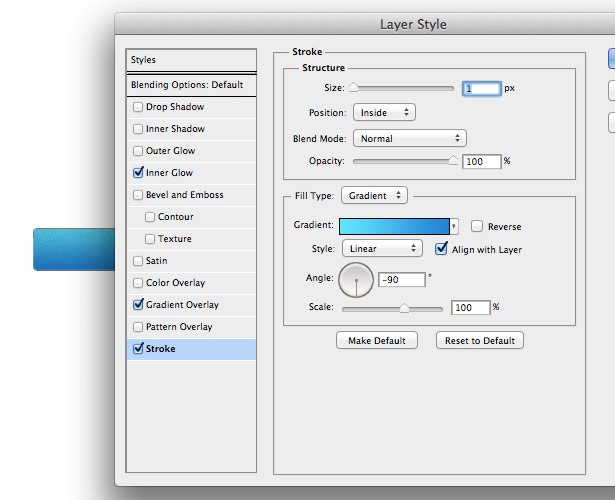
6. Gradient stroke
Add a stroke to the shape using the values shown. In the options choose a gradient fill type with the colours #1784d5 to #24e3ff. Using the gradient fill type adds an extra dimension to the button and enhances the effect that there's a light source coming from above.
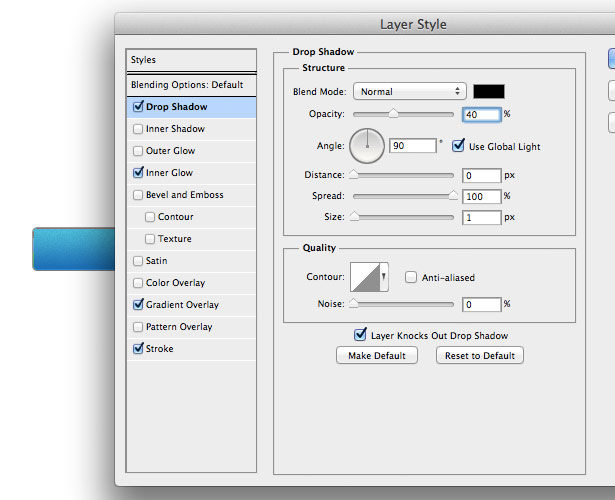
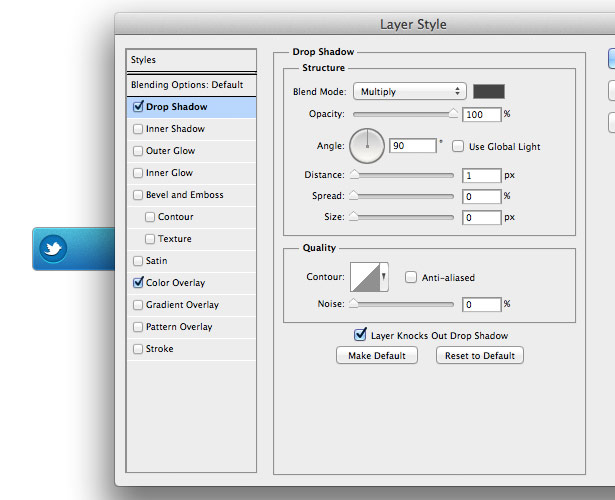
7. Drop Shadow
The next thing we're going to add is a drop shadow. This will help the button sit well on the page. I have used a #000000 stroke with a 40% opacity. The distance is set to 0, spread to 100% and size to 1px. This is the last style for our rounded rectangle.
8. So far so good?
Click ok on the style dialog and check out the finished rounded rectangle for our twitter button. If you feel that things can be tweaked, go ahead and dive back into the layer styles. I'm pretty happy for now, so lets add the Twitter icon.

9. A perfect circle
In my sketch the icon sits within a circle. Make a 30px by 30px circle using the ellipse shape tool. This size means we will have 6px of breathing space outside the circle, whilst being big enough to fit an icon inside. Arrange the circle inside the rounded rectangle.

10. Inset the circle
Add the following styles to the circle to make it look like it's set into the rounded rectangle. Pull up the layer style dialog and add a colour overlay of #0d6fb8 and a #24e2ff drop shadow with 1px distance and 0px spread and size.

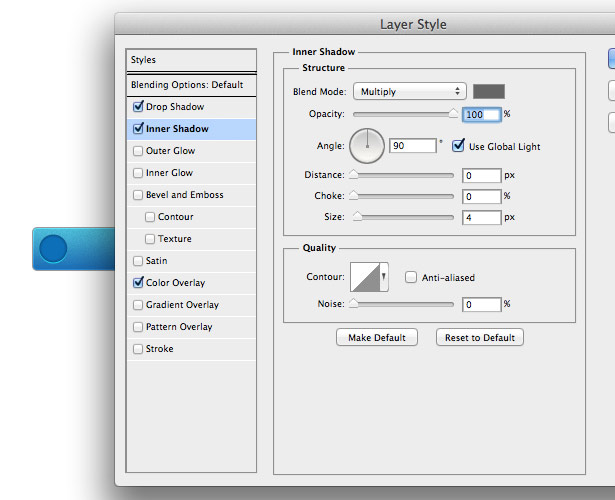
11. Inner shadow
Then give the circle an inner shadow. This will have a colour of #666666 with a multiply blend mode. Set the distance and choke to 0px and the size 4px. This will really make the circle appear inset into the rounded rectangle.
12. Some more grain
We're also going to give the circle some subtle texture. Add an inner glow using #0b78b9 for the colour. Then set the values to be the same as the ones shown in the screenshot. Once again, play around with this and make sure it's just visible.
13. Something's missing!
Close the styles dialog and check out your button so far. Looking good but I think we're missing something - the icon and the text! Open tw-icon.png, copy and paste it into the main document and arrange it so it's bang in the middle of the circle.

14. Icon drop shadow
Add a drop shadow to the icon. Our light source is coming from the top of the button, so the drop shadow needs to be below the icon. In the styles dialog set a drop shadow colour of #444444 with a multiply blend mode and distance of 1px.
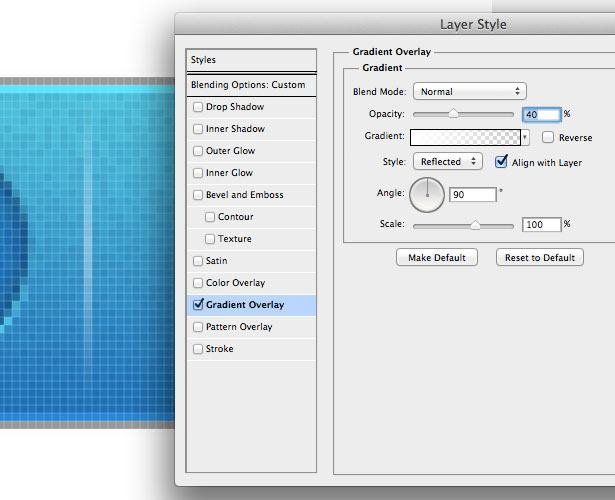
15. Divider
Now we need a divider between the icon and text area. Using the rectangle tool, make a 40px high by 1px wide shape. Make the layer fill 0%. Then open the layer styles and add a #ffffff to transparent gradient overlay. Make the opacity 40% and style reflected.
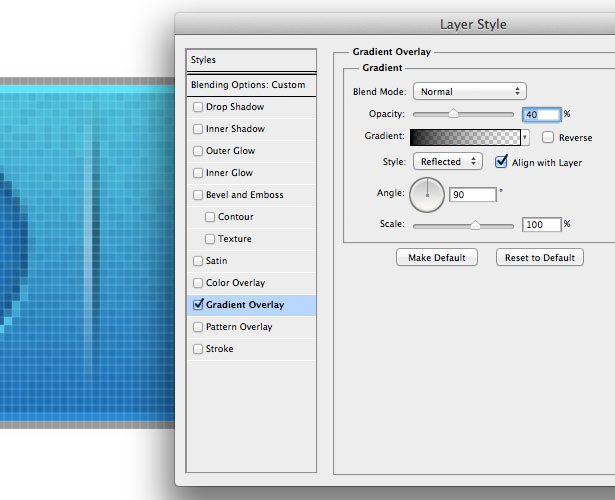
16. Repeat
Repeat the last step but make the gradient color #000000 to transparent. Place both rectangles exactly side by side and arrange them 6px to the right of the circle which contains the icon. Also make sure the rectangles are vertically in the center of the rounded rectangle.
17. Time for the text
Finally, make a text box in the canvas and type 'Follow me on Twitter' in #ffffff. Change the font to Helvetica Neue Bold, size 16px and letter spacing -10px. Then arrange the text vertically in the middle of the rounded rectangle and 10px to the right of the divider.
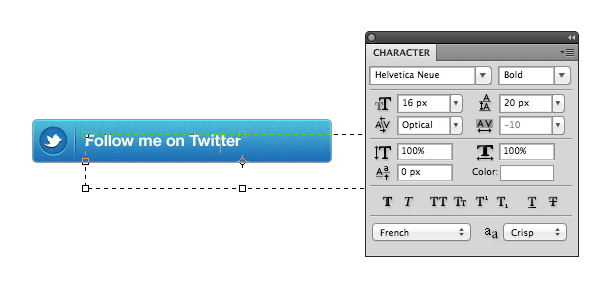
18. Style it up
The text will follow the same style as the Twitter icon. Right click on the Twitter icon and hit "Copy Layer Style". Then right click on the text layer and hit "Paste Layer Style". This will make sure the drop shadow style is consistent between the icon and the text.

19. Rollover
The button rollover is important and adds a lot to the user experience. Decent rollovers can make a huge difference! Select all the layers apart from the background and group them into a folder called "state1". Then duplicate this group and name it "hover".
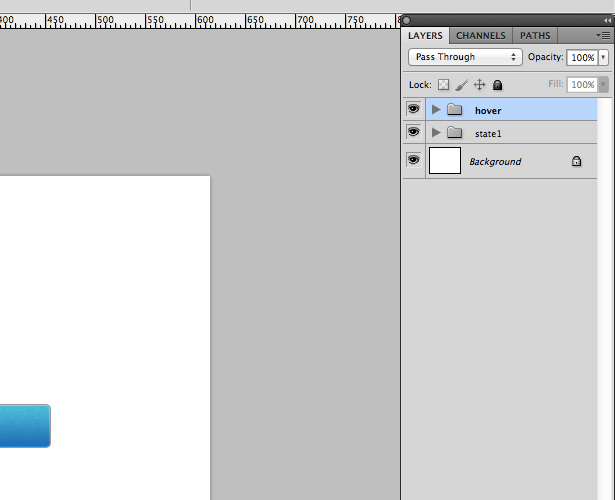
20. Reverse and shift
Select the rounded rectangle in the "hover" group. Open its layer styles and tick reverse on the gradient overlay. Click ok. Then move all other layers down 1px. Turn the "hover" group on and off to test the rollover state. The 1px shift gives the rollover some movement.

21. Finished!
So there we have it, our finished Twitter button with rollover state!
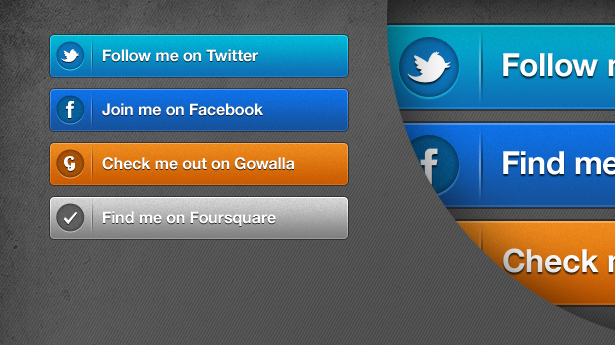
Making the rest of the set is a case of repeating the above steps and changing the colours, text and icons to suit. All assets are included in the download along with my finished layered PSD.
Get the latest Photoshop CS6 review from our sister site Creative Bloq.
Where Is the Settings Button on Spectrum Remote
Source: https://www.creativebloq.com/design/create-set-beautiful-social-media-buttons-11116664
0 Response to "Where Is the Settings Button on Spectrum Remote"
Post a Comment